
Automated Messaging Triggers
Administrative users can create automated tasks and email messaging using customizable templates triggered by specific events. This feature streamlines communication and task management, ensuring key team members stay informed and on top of critical updates by:
Automatic Role Assignment: Schedule items can be automatically assigned to specific roles. For instance, when a placement is nearing its end, the system can generate a reminder task and assign it to the job owner, the candidate’s recruiter, or other relevant team members.
Targeted Email Alerts: Email notifications can be sent to designated roles or specific email addresses. For example, alerts about expiring licenses can be sent both to the candidate and to your internal licensing coordinator.
What is a Trigger?
A trigger is an automation rule. You define:
What event should cause it to fire (e.g., a placement is created)
What action it should take (send an email, create a calendar reminder, or both)
When it should fire relative to a key date (e.g., 3 days before start date)
Who should receive it (candidate, recruiter, client contact, and more)
What content it should contain (subject line, body text, or a linked email template)
Triggers are configured once by an administrator and then run automatically from that point forward.
Trigger Types
1. Create Job Order
Fires when: A new job order is saved in the system.
Use it for:
- Notifying the account manager or ownership recruiter that a new role has been opened
- Sending an automated acknowledgment email to the client contact linked to the job
- Creating a reminder to follow up with the client after a set number of days
Example: "When a new job order is created, immediately send an email to the account manager with the job details."
2. Create Placement
Fires when: A placement is created.
Use it for:
- Sending a placement confirmation or welcome email to the candidate
- Alerting the recruiting team that a role has been filled
- Setting a reminder for the recruiter X days before the placement start date (e.g., to confirm the candidate is still on track)
- Sending an onboarding communication to the hiring manager
Example: "When a placement is created, send a confirmation email to the candidate and set a reminder for the recruiter 2 days before the start date."
3. Licensing (Automated / Scheduled)
Fires when: A candidate's licence expiry date falls within the trigger's configured window. This runs automatically on a daily schedule — no manual action required.
Use it for:
- Sending automated expiry reminders to candidates before their credentials expire
- Notifying the licensing coordinator or recruiter to follow up
- Ensuring compliance by catching upcoming expirations before they lapse
Example: "30 days before a candidate's licence expires, send an email to the candidate and the licensing coordinator."
Note: This trigger runs daily in the background. It does not require any user to save a record — it checks all candidates automatically.
4. Placement Extension
Fires when: A placement extension is created.
Use it for:
- Notifying the candidate that their contract has been extended
- Alerting the account manager or team lead
- Setting a reminder for the new end date to prompt a renewal conversation in advance
Example: "When a placement is extended, send an email to the candidate confirming the new end date, and set a reminder for the recruiter 2 weeks before the extension ends."
5. Post/Pre Schedules
Fires when: Before or after a scheduled activity (such as an interview or meeting) of a configured type.
Use it for:
- Sending interview confirmation emails to candidates and client contacts when an interview is booked
- Sending a pre-interview reminder to the candidate 24 hours before
- Creating a post-interview follow-up reminder for the recruiter
- Automating any communication that should happen around a scheduled event
Example: "When an interview is scheduled, send a confirmation email to the candidate and the hiring contact. Set a reminder for the recruiter 1 hour after the interview to follow up."
Tip: The timing for this trigger can be set in hours, days, or weeks before or after the schedule date.
6. Placement Rate Changes
Fires when: The pay rate or bill rate on an existing placement is modified.
Use it for:
- Notifying the candidate of a rate change
- Alerting the account manager, team lead, or payroll team
- Creating a paper trail reminder to review the updated placement
Example: "When a placement's pay rate is updated, send an email to the candidate and account manager summarising the change."
7. Timesheet Approval Email
Fires when: A timesheet is approved or rejected through the internal Mindscope system.
Use it for:
- Confirming to the candidate that their timesheet has been approved and is being processed
- Notifying the candidate if their timesheet has been rejected so they can correct and resubmit
- Reducing inbound enquiries about timesheet status
Example: "When a timesheet is approved, automatically send a confirmation email to the candidate."
8. Licensing From Portal
Fires when: A candidate submits or updates licensing information through the candidate portal.
Use it for:
- Alerting the licensing coordinator or recruiter that new credentials have been submitted and are ready for review
- Triggering a workflow to verify and approve the submitted information
Example: "When a candidate submits a new licence via the portal, notify the licensing coordinator by email."
9. New Opportunity
Fires when: A new client opportunity is created in the system.
Use it for:
- Notifying the account manager, proposal writer, or ownership recruiter that a new business opportunity has been logged
- Alerting client contacts that their opportunity has been received
- Setting a follow-up reminder to progress the opportunity
Example: "When a new opportunity is created, send an email to the account manager and proposal writer, and set a 5-day follow-up reminder."
10. PO Remaining Value
Fires when: Invoices are attached to or removed from a Purchase Order, causing the remaining budget to drop below a configured threshold.
Use it for:
- Warning account managers or client contacts when a PO is approaching its spending limit
- Preventing overspend by giving advance notice before the budget runs out
- Triggering a conversation with the client about increasing or renewing the PO
Example: "When a PO's remaining value drops below 20%, send an alert email to the account manager and the client contact."
Portal Timesheet Triggers
These are specific to timesheet activity carried out through the candidate or client portal, and are separate from the internal timesheet approval trigger above.
Trigger |
Fires When |
|---|---|
Timesheet Approved (Portal) |
A timesheet is approved via the client portal |
Timesheet Rejected (Portal) |
A timesheet is rejected via the client portal |
Candidate Timesheet Note |
A candidate adds a note to a timesheet in the portal |
Client Timesheet Note |
A client contact adds a note to a timesheet in the portal |
Use them for: Keeping both the candidate and client informed in real time as timesheets move through the portal-based approval workflow, and ensuring notes don't go unread.
Configuring a Trigger
All trigger types share the same configuration options. When setting up a trigger, you will define:
Setting |
Description |
|---|---|
Trigger Type |
Which event causes it to fire (from the types listed above) |
Action |
Calendar Reminder, Email, or both |
Timing |
X days / weeks / months / hours before or after a reference date |
Reference Date |
Entered date, Start date, End date, or Licence expiry date |
Employment Type Filter |
Limit to Permanent, Temporary, or Contract placements only (optional) |
Geography Filter |
Limit by country or province/state (optional) |
Recipients |
Who receives the trigger — see options below |
Subject |
Email subject line |
Body / Template |
Free-text note or a linked email template |
Attachment |
Optionally attach a document (e.g., a placement card) |
Recipient Options
You can send a trigger to any combination of the following:
Candidate
Client contact (all contacts on the job, or just the default contact)
Client company
Account manager
Ownership recruiter
A specific named recruiter
Recruited by / Opened account / Worked account
Team leader, Marketer, Scheduler assistant, Team assistant
Licensing coordinator, Credentials coordinator
Proposal writer (for Opportunity triggers)
A specific email address
Create a Trigger
1. Once logged in, click on the My Company tab at the top of your screen. (Highlighted below)
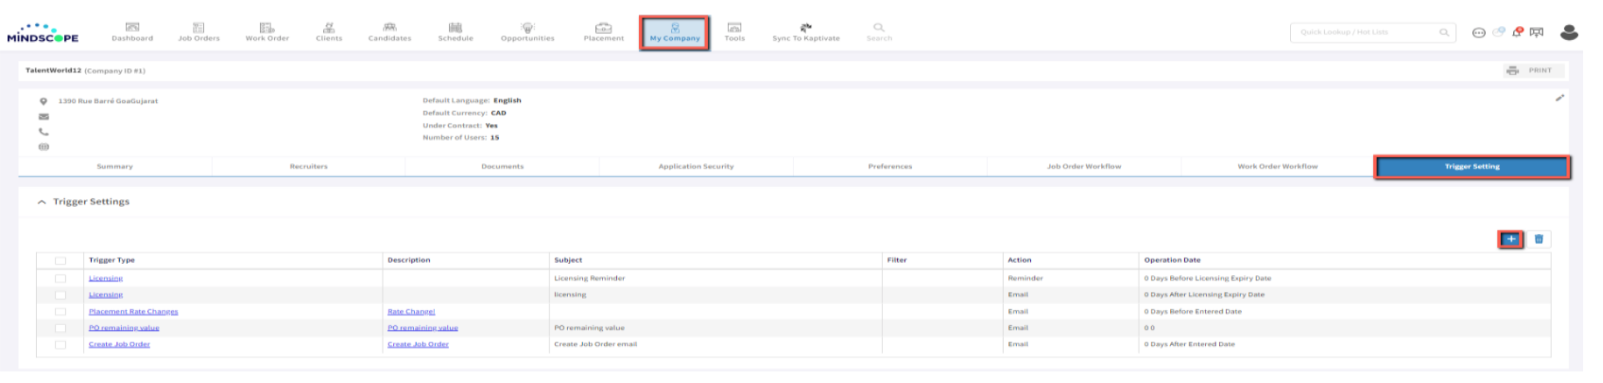
2. Click on the Trigger Setting tab found on this page. (Highlighted above)
3. Clicking the blue + button underneath the Trigger Setting tab will open up a new window allowing you to create a Trigger.
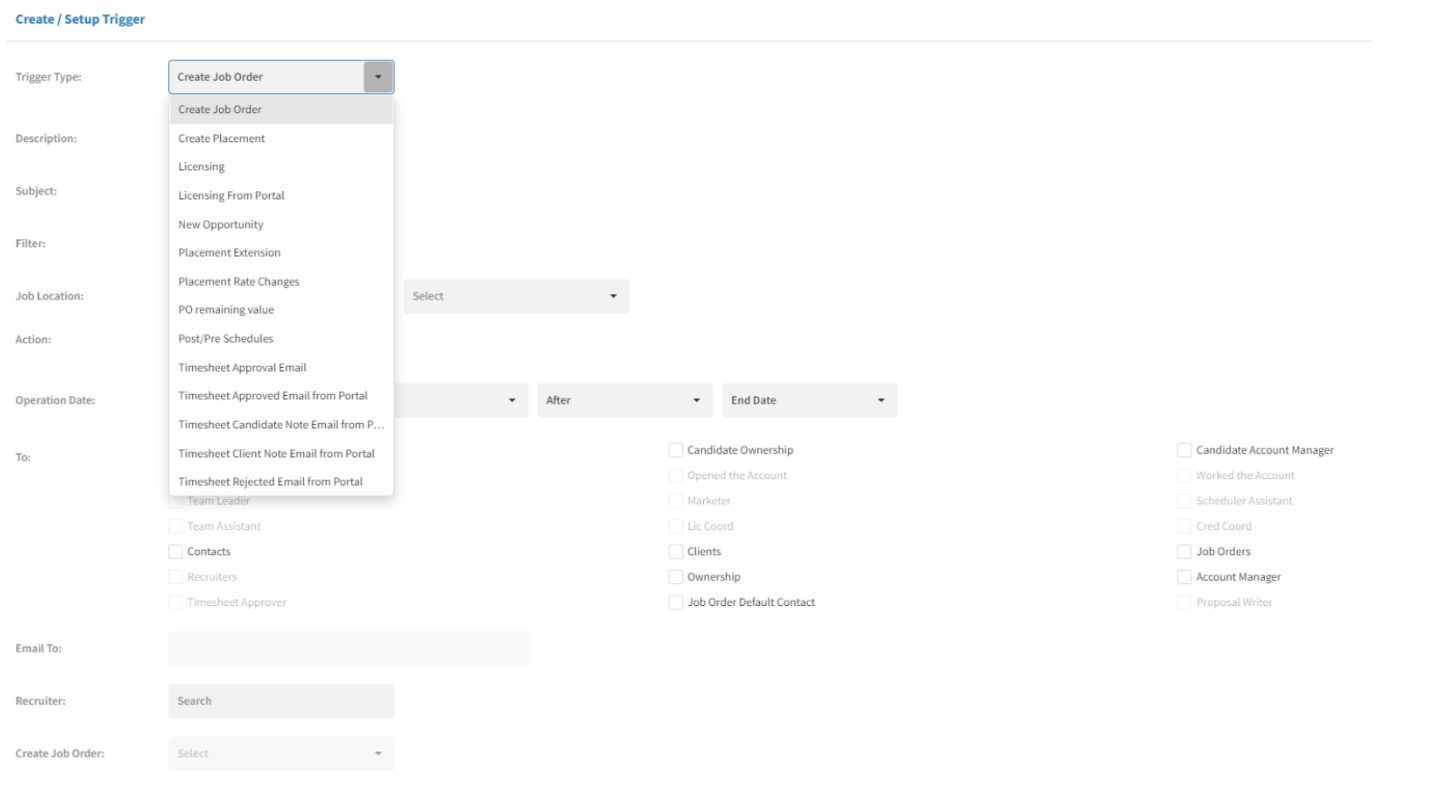
4. Choose Trigger Type from the dropdown.
5. Add a Description for the Trigger top describe the purpose. The description will only be visible to admins within the list view of triggers.
6. Add a Subject that will appear to users within their notifications. The subject will be present to all users upon receiving the notification.
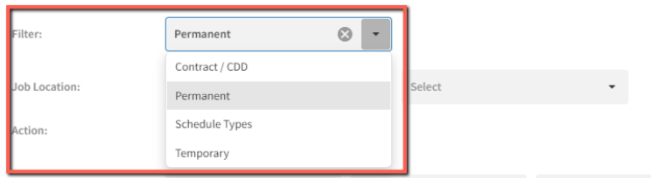
7. Select a Filter to go along with the specific trigger that is being configured. Each trigger type will have its own appropriate filter drop down.
8. Choose whether the trigger should be a Schedule Reminder or an email notification. (Schedule Reminders pop up at the top of the Mindscope screen)
9. Indicating the Operation Date will notify Mindscope when the notification should appear for the user. To have it appear immediately after a specific action has occurred, the following Operation Date should be entered:

10. Depending on the Trigger Type and Action, the 'To' field (seen below) will allow for check-offs of the individuals that are to receive the notification. Multiple receipents can be selected.

11. In the Email To section, you can add multiple emails by adding a comma as a differentiator.
12. A template for the notification can be created in two ways:
(1) Using an existing email template or
(2) creating a template at the bottom of the screen.
13. Create Job order: The names on the drop-down field will alter based on the trigger type selected.
Helpful Tips
Multiple triggers per type: You can create more than one trigger for the same trigger type. For example, you could have one placement trigger that sends an email to the candidate immediately, and a separate one that creates a recruiter reminder 5 days before start date.
Templates: For polished, branded emails, link a Mindscope email template to your trigger rather than using free-text content. Templates can include merge fields populated with live data from the placement, candidate, or client record.
Testing before go-live: Set up a trigger with your own email as the recipient to confirm the content and timing look correct before directing it to candidates or clients.
Licensing triggers run daily: Unlike other triggers which fire in response to a user action, the Licensing (type 3) trigger runs automatically each day. There is no additional setup required once it is configured.